Saturday, December 31, 2011

Small photo updates.

Finished laying the pennies. Going to do the surface tomorrow.
Belle planted a lamb hass avocado tree:I painted my beer kegs with chalkboard paint to keep track of what is in which keg.

Fired up the gas lamp. (Belle has been busy stripping that wallpaper):

Labels: , , ,

Kai's Victorian Door

I am catching up on blog posts. Belle and I have had this week off of work so quite a bit has gone down here @ Halladay.

Kai likes to use the bathroom very (by MacGyver standards) early in the morning. When she starts running around the house in the AM someone better open a door or there may be a crouton on the carpet. It was time for me to put in her very own door. The designs of dog doors kind of suck. Most all are ugly white plastic and essentially hideous. We planned to mask the hideous white plastic with some real wood trim to match the style. What I did not account for was the thin center of the door is too thin for the trim boards to cover the plastic. Instead I just butted it up against the plastic and bottom of the door. It also hides the shims I had to put in to make the dog door stable/tight to the top side.

These things are pretty easy to install. I drilled 1/2" holes on each of the corners then just jigsawed the opening. The wood trim got sliced on the new chopsaw and nailed in place with a finish nailgun.

Pic:

Labels: , ,

Wednesday, December 28, 2011

Botany 103: companion planting

The Great Bean Bakeoff

Raised bed #4.  During installation, MacGyver uncovered a massive decomposing palette.  This may have been to store treasures off the ground when house storage was no longer an option.  It also may explain why the pecan tree looked so sick/thirsty.  After spending an inordinate amount of time with  companion planting quick reference, I decided to plant all 6 heirloom bean varieties (bush & pole) from my apocalyptic readiness kit in conjunction with garlic, shallots, carnival carrots (multicolor), and zucchini which I received as gifts (thanks!).  This builds off lessons learned from raised bed #1:  different varieties of the same plant perform wildly differently (see: cherry tomatoes) and one trellis of peas doesn't yield enough to make a persistently harvestable full serving of veggies.  I've also heard horror stories about prolific zucchini, so I started a few of them in a potting tray to avoid an Audrey II type situation.  I tried to plant the purple podded beans towards the less-accessible side and center to streamline harvesting.  I used the companion plants to designate the boundaries.  We threw some chicken wire on top to keep the tunneling Klee Kai from messing up the plan.  


Bitter Greens & Beer

The mixed greens we planted in front of the spinach took on a life of their own.  We tried clear cutting them and juicing them, but the ones that were thriving were the super bitters.  No amount of banana, OJ, or chocolate protein powder was going to make that smoothie palatable.  I clear cut and composted most of it.  To fill the void, I started a couple basil plants from gift seeds.  Our last basil in molecule garden got decimated, so I want to plant the replacement where we can keep an eye on it.  Fortunately, basil plays nice with its future neighbors (pepper, lettuce, tomatoes, and spinach).  To free up space in the potting tray, I transplanted the 7 globe artichoke starts to be ground cover under the Reed avocado tree.  These guys are doubling as landscaping since they take a year to mature. 
MacGyver also ordered myriad hops varieties for Operation Home Brew.  Maybe they should grow up the house after it gets repainted.. or maybe the final fence when it's installed...  we're weighing our options and testing out how much sun these guys need with some planter prototyping.  

Finger Foods
Raised bed #3 is a petite triangle of snack food.  We started with edamame (which is finally sprouting). Strawberries are also starting to sprout.  The hope is they will be low-profile edible living mulch.  If this batch doesn't work out, we've got gifted seeds (w00t!).  We set the triangle up on the major thorough-fair between the gate and the backdoor right by the mega hose, so we can stay on top of it. 
misc Epic innovations
  • Office Yacht desk converted to back porch work table (aka MacGyver's junk drawer)
  • Upgraded front room theater keyboard and mouse to ones which are more responsive
  • Sleeping bags in bed to minimize draft (now with bed buddy bed warmer)
  • El cheapo paintbrushes for wood stain crevice application and paint stripping (better finish, less chemical burns)
  • Lil victorian dog door concept (implementation was all MacG). 


Labels: , , ,

Saturday, December 17, 2011

Tub finished.

Here are some shots of the mostly finished tub. I have a really cool idea about making the now refinished clawfoot shower capable as well.

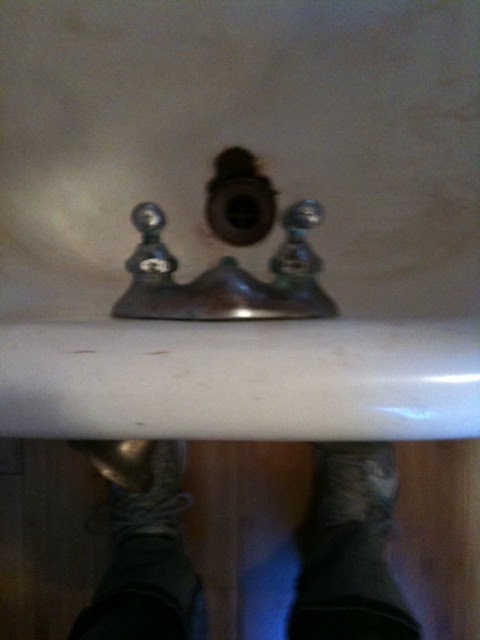
Knocking the chrome off the fixtures took a couple hours but I love the brass look. The handles are not brass or are heavily plated, I still think they look ok, especially with the brass bolt shining in the center.The rest of the tub came out really good too, although I worry about the bondo given how forcefully the water comes out of that spigot.


On to my idea. We have a hookup ready for the shower head at the slanted side of the tub. I want to build a shower curtain that hangs above the tub (the ceiling is very high in all of our rooms, bathroom included) and that pulls down vertically. The bottom of the curtain will have a flange that matches the curved top rim of the tub and latches on with magnets. When done with the shower you can lift the magnets off and the whole curtain will retract back up to the ceiling. Need to work out how to have it so drips land in the tub while the curtain is up and drying and it might be difficult to have 2 degree of freedom folds of plastic around the curved part of the tub.

Labels: , ,

Sunday, December 11, 2011

Old Ironsides

Nominally, this is a post about restoring the clawfoot tub in the one [formerly] "working" bathroom.  However, this is mostly fun facts learned from shadowing MacGyver.

Fun Fact:  MacGyver does not make shopping lists...  Belle makes them and arranges them roughly by Home Depot aisle location.    
  • Sponge 
  • Brasso
  • Gasket rubber (we had to buy a generic reddish sheet and cut to fit)
  • Tough Tile Tub & Tile Refinishing Kit (includes TSP, gloves, 2 pads steel wool, 2 cans of paint)
  • Naval Jelly
  • Bondo
  • Painter's paper
  • Painter's tape 
  • Box o' rags
  • Sand paper (220)
  • Utility knife
  • Cylinder o' pencils
  • Pipe wrench
  • Dremmel
1.  Convert Rust.  Over the past couple weeks, we've coated the drain with naval jelly (phosphoric acid), rinsed, and scraped.  This converts red rust to black rust you can sort of sand off.  


2.  Clean tub & disconnect fixtures.  This involved a bottle of TSP (trisodium phosphate) and sponge.  You probably want to avoid eye contact with The Lorax at this point.  We also discovered our gasket for the overflow drain was in bad shape.  Fun fact: fixtures can still work like hoses when disconnected to help rinse the tub...  but if you've disconnected your overflow drain, you probably don't want to fill the tub to clean it...       

3.  Cover black rust and divots with Bondo (polyester resin used for auto body work).  Fun fact:  Bondo can be sanded so you don't need to agonize about a smooth initial application.  MacGyver used the length of a pencil to get the drain patch acceptably flush.  It's stinky, but dries in 15 minutes which is about how long you need to prep splash guards for spray painting.  

4.  Protect surfaces you don't want to get hit with paint.  MacGyver intervened in my fraught hand-ripping paper to line the floor routine.  You can balance the roll of paper on a towel rack, cut with utility knife, and tape a protective bib to the sides of the tub which you didn't plan to paint.  You can also protect your copper drain by covering it with painter's tape, cutting around it, and peeling off the excess.    

5.  Sand the bondo smooth and spray first coat with your refinishing kit can of epoxy white paint.  Drips are bad.  Rags in a box are the undo button.  Spend the 15 minutes it needs to set on sanding/dremmelling/brassoing the green residue off the faucet fixtures.  Fun  Fact:  some paint can be burned off with a blow torch (see: light fixtures).  This is not that kind of paint.  

6.  Apply second coat.  Realize you still have ample paint left over to refinish nasty kitchen sink.  Repeat steps 1-5.  

7.  Realize you need to wait 72 hours before using either kitchen sink or tub.  Wish you had taken MacGyver up on that last call for baths...         

Labels: , , ,