Wednesday, August 29, 2012

Villa D'Este

Why is Villa D'Este not all over Pinterest?

At a girlfriend's wedding in Sorrento, another guest suggested a day trip from Rome to check out this awesome water garden in Tivoli.  For the gardening/engineering inclined, this place easily trumps the heavily touristed attractions within the city limits.  Normally, I abstain from photos, but this time I couldn't resist.

tl;dr a Cardinal in the running for Papacy decided to drown his loss by decking out his hillside govenor's mansion with some serious hydroponics (1550-72).


I had to walk to the other end of the property to capture this one in its full glory (better pro pictures here).  It is the culmination of 3 terraces and 2 fountain installations.  Having just come from St Peter's in the Vatican the day before, the top fountain (Fontane Dell'Organo) struck me as run of the mill ornate.  However, in its heyday, it was a water-powered organ, thus elevating its status to Epic.

Behind the falls, there is a second terrace you can cross.  There are 3 grottos behind the falls, each with their own fountain.  This made for some rad mid-day A/C, but was a bit too loud to carry on a conversation.  All the same, it was amusing to picture fussy Shakespearean era ladies cruising around the gardens in fashionable, if not entirely functional attire.

I also managed to capture an awesome triple rainbow from one of the two turrets on that second tier (the middle of the Fontane di Nettuno), despite my suboptimal 3 megapixel vintage iPhone camera.

At the bottom level is a series of pools (peschiera) with some heavy duty carp.  These guys are arm-length+.  Inside the Villa, the exhibits were focused on food during Rinascimento.  From what little I could understand of the Italian program, the kitchen of this property could put together a pretty serious spread, so I wonder if they actually fished these guys up and cooked them.  After reading about the chicken's Southeast Asian roots in my "On Food and Cooking" book last night, it was also pretty neat to see medieval sketches of the typical poultry of the region (with a quail-like crest) and something exotic called Indian gallus, which looked suspiciously like our modern chicken.  Despite the well-stocked fish pond, I still managed to get a couple mosquito bites in my reverie.  I guess this is to be expected with so many water features for expectant mosquito mothers to choose from.
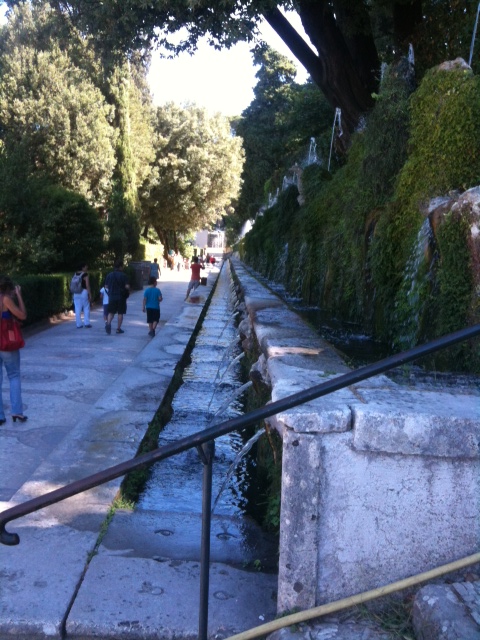
This massive ferny trough was also pretty impressive.  Le Cento Fontane (100 fountains).  While I was thinking that if a setup like this didn't get too hot, it might make an excellent tank for trout, MacGyver was noticing that the ones on one end of the causeway seemed to have more water pressure.  Could have been attributable to the gaping 101st "fountain" which we found midway.  Tivoli is a giant hill and Cardinal Ippolito was savvy to realize that this landscape held great hydroponic promise.  Even so, the amount of planning that had to go into getting a works like this into equilibrium without the help of pumps and what not is pretty astonishing.  

We'd been brainstorming ways to feed a more modest (affordable) system with greywater, rain water, and the like.  My concern was that all the lint and debris coming out of the wash would gum up the system, but a banister like this might provide some basic filtration and complete the look of our cement back steps....


If swimming pools could look like this, I would understand why people take the trouble.  Not sure if the sanitary effects of chlorine fully offset the awesomeness of having mossy ferny walls for landscaping.  Perhaps a modern rendering wouldn't turn out quite as awesome because a lot of the sculptures and raised beds were cut out of corral which is a bit of a faux pas to harvest these days.  Judging by its depth, people probably didn't actually swim in Fontana dell'Ovato, but how rad would it be to have a second story semicircular catwalk you could dive off of or lounge in the shady arcade behind the falls on the ground level?

Labels: , , , ,

Sunday, July 29, 2012

Massive Updates!

Well things have been jamming over here. The big news is that the foundation replacement is done, the disintegrating bricks are only for looks now! Our foundation replacement went very smooth, big thanks to Antonio and Symon @ Copper foundation, this was very worrisome for us seeing some of the other information on the net. Luckily for us Copper did a stellar job, I would recommend these guys easily.

In the DIY arena I have gotten back in the rhythm of getting work done around here now that work @ work has calmed down. So what has happened?
  • Sprinkler style drip irrigation system. This involved digging a massive trench all the way from the middle of the side yard back to the fruit trees. I got a good workout and a tan, and most importantly we got some squid hookups that allow us to easily expand the drip irrigation without pressure losses. Water now goes in parallel instead of series. 
  • Ran electrical (with ground wires) to the garage, and moved the work shop from the back porch into the garage.
  • Downstairs bathroom has a working (awesome) shower and we have some rad design surprises. It will be finished soon!
  • The fence in the front yard was super degraded (termites) so I replaced the weak beams with pressure treated outdoor wood and it is much sturdier now. Held up to klee kai pen testing. 
  • Installed a skylight in the back porch and set it up as a proto-greenhouse for Belle. Found some cool L brackets from the old sink and built a potting shelf. Also lined the edges of the skylight with the cool aluminum metal we used for the custom egg carton.
Once again I am promising to update the blog more and add photos. I swear I will this time, but for now going to grab a homebrew and chill because my body is destroyed.

Labels: , ,

Saturday, February 11, 2012

Life is good.

Once again the blog has seen neglect due to life getting in the way. I will really try and at least get a post down a week if nothing else for my own benefit in keeping some tabs on progress. Speaking of progress, it seems slow as we go but looking back it feels like we are keeping the pace at least somewhat. I have set up a plan where after work I put in a minimum of 2 hours on the house. So far it is going very well and progress is much less stagnant on the weekdays.

We took some of the chalkboard paint and put a massive to do list on the kitchen wall. It really drives home the motivation that I should get this stuff done now. Good planning Belle, keep me on task! The main project remains the downstairs bath and bedroom. The bed was moved out because the downstairs was continually so filthy that it just made more sense to put it in the 'dining' room for now. I have stripped nearly all the wallpaper from the bedroom and have patched most of the plaster cracks.

PaGyver has been trucking on the bathroom. We have run all new drainpipes (including a gray water diverter), I put in the new electrical and we have placed new floor joists down. The whole floor had to drop 3" to accommodate the concrete for the wetroom. Plywood is down and the next step is to hot-mop the whole thing with tar. Dad took the week off to go on the singer-songwriter cruise to the Bahamas so Belle and I have focused on some other areas in the meantime. Here are some recent developments in Hallidayland.

-We got chickens! Inky, Blinky, Pinky, and Clyde have moved in to the coop.
--Belle revamped the chicken tractor. The ugly green clunky one has been replaced with a lightweight easy to move one.
-We have a map of the Sierra Nevadas that we have been filling in camping locations on . It got its very own oak frame and will be on the wall soon.
-Belle has crafted some shroom logs. Well I drilled the holes and hammered the pegs but these should be pretty cool in about 6 months when they are covered in yummy oyster shrooms.
-The brewery has been in full swing. Doing batch 5 for the year right now.
-Sold the 1923 downstairs tub to a lady in Venice Beach also doing a resto. Glad it went to a good home.

In Kai land, Gizmo (Kai's best friend from work) has been staying with us. It is pretty awesome, despite all the attention we give Kai, it just seems like she is happier when Giz is around. They have been playing pretty much all day today. Kind of makes me want to get a second dog. ^^ An epic game of tug of war.

Labels: , ,

Saturday, January 21, 2012

Big update lots done.

We finished the penny floor and are 95% done with the office. It is currently in a good enough for government work state and we have moved focus on to the bedroom and bathroom. After the floor was surfaced I transformed one of the el-cheapo mirrors into a pretty cool looking wall mirror with some redwood and old electrical wires from the basement.
We added some antique furniture from my Grandmother and Aunt and popped the super comfy reading chair in the corner. The room looks really good!
Today I finished stripping the old wallpaper in the bedroom. About halfway done patching all the cracks in the plaster. After that it is primer and then we are going to test some paint colors to see what looks good.

Another quick win was tearing the old runner from the stairs. The wood needs to be refinished but is otherwise in really good shape. We are most likely going to just restain it and leave it naked. Here is Belle cleaning the stairs after I pulled all the nails out. It was actually really gross carpet, but we are desensitized at this point. The snowflakes were horrible dustballs.


The big project however is the bathroom downstairs. PaGyver is spearheading the effort to turn the stinky old bathroom into a very cool but appropriate wet-room. So far we have completely gutted the room and ran new drain pipes for both the upstairs and downstairs bathrooms (no more galvanized!). This involved cutting a hole in the foundation to run the new pipe through and attaching it to the sewer outside the house. We have already connected it up and patched the foundation. Tomorrow the goal is to get the electrical in, finish the shower drain and put in a new wash machine intake/drain. We are turning the front closet and bedroom closet into a washer/dryer room while leaving some closet space on the bedroom side. The front closet will get moved to a hidden passage under the stairs. Very exciting.

Labels: , , ,

Saturday, December 31, 2011

Small photo updates.

Finished laying the pennies. Going to do the surface tomorrow.
Belle planted a lamb hass avocado tree:I painted my beer kegs with chalkboard paint to keep track of what is in which keg.

Fired up the gas lamp. (Belle has been busy stripping that wallpaper):

Labels: , , ,

Sunday, December 11, 2011

Old Ironsides

Nominally, this is a post about restoring the clawfoot tub in the one [formerly] "working" bathroom.  However, this is mostly fun facts learned from shadowing MacGyver.

Fun Fact:  MacGyver does not make shopping lists...  Belle makes them and arranges them roughly by Home Depot aisle location.    
  • Sponge 
  • Brasso
  • Gasket rubber (we had to buy a generic reddish sheet and cut to fit)
  • Tough Tile Tub & Tile Refinishing Kit (includes TSP, gloves, 2 pads steel wool, 2 cans of paint)
  • Naval Jelly
  • Bondo
  • Painter's paper
  • Painter's tape 
  • Box o' rags
  • Sand paper (220)
  • Utility knife
  • Cylinder o' pencils
  • Pipe wrench
  • Dremmel
1.  Convert Rust.  Over the past couple weeks, we've coated the drain with naval jelly (phosphoric acid), rinsed, and scraped.  This converts red rust to black rust you can sort of sand off.  


2.  Clean tub & disconnect fixtures.  This involved a bottle of TSP (trisodium phosphate) and sponge.  You probably want to avoid eye contact with The Lorax at this point.  We also discovered our gasket for the overflow drain was in bad shape.  Fun fact: fixtures can still work like hoses when disconnected to help rinse the tub...  but if you've disconnected your overflow drain, you probably don't want to fill the tub to clean it...       

3.  Cover black rust and divots with Bondo (polyester resin used for auto body work).  Fun fact:  Bondo can be sanded so you don't need to agonize about a smooth initial application.  MacGyver used the length of a pencil to get the drain patch acceptably flush.  It's stinky, but dries in 15 minutes which is about how long you need to prep splash guards for spray painting.  

4.  Protect surfaces you don't want to get hit with paint.  MacGyver intervened in my fraught hand-ripping paper to line the floor routine.  You can balance the roll of paper on a towel rack, cut with utility knife, and tape a protective bib to the sides of the tub which you didn't plan to paint.  You can also protect your copper drain by covering it with painter's tape, cutting around it, and peeling off the excess.    

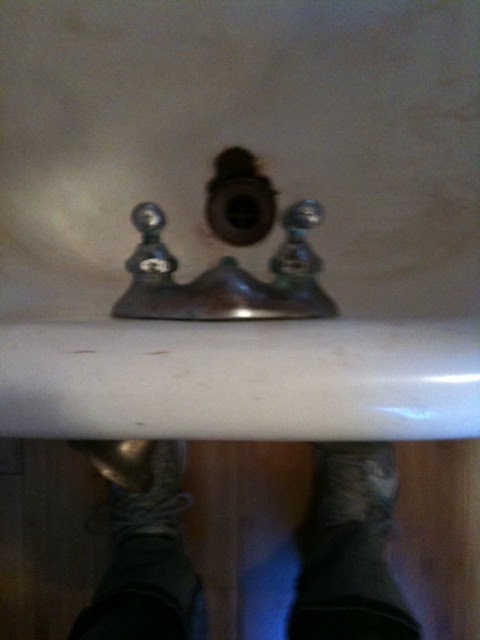
5.  Sand the bondo smooth and spray first coat with your refinishing kit can of epoxy white paint.  Drips are bad.  Rags in a box are the undo button.  Spend the 15 minutes it needs to set on sanding/dremmelling/brassoing the green residue off the faucet fixtures.  Fun  Fact:  some paint can be burned off with a blow torch (see: light fixtures).  This is not that kind of paint.  

6.  Apply second coat.  Realize you still have ample paint left over to refinish nasty kitchen sink.  Repeat steps 1-5.  

7.  Realize you need to wait 72 hours before using either kitchen sink or tub.  Wish you had taken MacGyver up on that last call for baths...         

Labels: , , ,

Tuesday, November 15, 2011

Penny floor details

Houston we are out of pennies!


Mysteries of the penny floor disclosed: There was not much online about how to install a penny floor. Plenty of articles describing the floors with pictures, but very little info on glue, flooring material etc. Those guys used a black grout, it looks like the people here used thin set. Not really sure what these guys used but I am very happy that I am only doing 100sqft. I got a tip from the comments here stating that resin was used as a topcoat, that gave me an idea.

We definitely wanted the floor to be sealed. While having exposed pennies age would be cool we figured it would be too hard to clean and too cold on the feet. I had an extra gallon of polyurethane snowboard resin which has been very useful in making random things so I figured I would give that a try. As I mentioned before the first attempt was to actually put the whole thing in the snowboard vacuum bag and essentially veneer the pennies onto existing laminate tile. I never made it that far because I discovered that hand laying these is easier and not that difficult. I wanted the mould to be extremely precise (when intersecting pennies are 5/8" to center, pure diameter they are 3/4". So I used a 3/4" router bit on 5/8" lines. It came out ok, with some gaps, but the real trouble is intersecting the tiles. I probably could have got it working in the vacuum bag but it would take a long time to build all the 1x1 tiles even 4 at a time.

Hand laying is the way to go. Polyurethane resin works very well and it holds my snowboards together so I know it has pretty good impact strength. It has very poor tensile strength so I expect cracks in the first earthquake. To strengthen it I could have laid a layer of fiberglass mat under the pennies, but I hadn't really thought of that and it would increase the cost. Once dried the surface is very smooth and not cold at all. As you can see from the picture below the resin amplifies the pennies shine when exposed to light.


In other news I noticed that the site (graf snowboards) where I learned how to make snowboards is no longer online :(. Going through that process taught me so much about laminate construction and exposed me to some great tricks (vac bagging)

Labels: , ,

Monday, November 14, 2011

Sticky fingers.


Lots has happened so it is about time for an update.

Did some mini projects during the week which included playing with fire, which has always been a hobby of mine. I burned the paint off of the brass chandelier in the office and re-wired it. It was not too bad to get the paint off, and we left some of the tarnish and burnt paint on for the distressed steampunk feel we are going for with the office. Rewiring it was quite a pain because of how the thing was built, in my confusion I ended up soldering it together 3 times, then running late live wired it in with rubber gloves on. Fun times.

Sunday was family day with Belle's mom, uncle and grandfather coming over and MaGyver coming down. We did the standard tour for the fam and before hitting original mike's for dinner I prototyped the first couple tiles for the penny floor. I had built a jig that was supposed to let us resin in a 1'x1' tile at a time, but in testing that simply did not work. I had also hand laid a tile with pennies and a resin top coat which came out much better. Based on this we decided to forgo laying tiles and simply penny over the existing floor. As of tonight, we have laid and coated about 2% of the floor, and it looks really good. Pics to come (I don't want to touch my phone with such sticky fingers.)

Once the floor is done, the office will be complete, just need to shuffle furniture around after that.

In addition to that we also removed the old in window AC unit, which was very gross. The kitchen looks noticeably better.
Scraped some more wall paper off the bedroom walls.

Meeting more of Belle's family was very cool, all very nice people (Hi!). Grandpa had some very interesting stories and it was very neat seeing him relate to some of the older parts of the house. I wonder if after another generation the nostalgia of seeing a push button lightswitch or a raised tank 'crapper' will be forever lost. I enjoy those details of the house for their difference and uniqueness, and it was interesting to see someone to whom they were so ordinary and familiar.

Labels: , , ,

Sunday, November 6, 2011

Mini project madness

Yesterday felt highly productive despite no large project being worked on by either Belle or myself. Friday night saw the completion of both the wiring work in the front room, and the painting in the office. This meant that we could move the computer/projector into its more permanent home in the front room and allow the projector to return to its cabinet instead of sitting on the floor. The morning was spent moving furniture around and setting up the picture location on the wall.

Afterward we moved to the pond. The water tube had been floating in the middle of the pond for a while and with the empty corner baskets really kept it from looking finished. Last week I had built a new bamboo spigot so that got installed while Belle planted some new vines on the corner baskets. The pond looks better than it ever has, woot!
We then took a trip to the homebrew store and home depot for a couple more projects the main one being a kegorator for my homebrews. The setup uses a converted wine chiller with enough space for two corny kegs and the 5lb CO2 tank. We have a bruery orchard white clone in there now that used lavender from the garden. One of my goals for the garden is to grow 100% of the ingredients needed to make a good homebrew.


Finally I really wanted to install the lantern over the castle gate to give it a finished look. That became the third mini project of the day and it got popped in as well as the flood lights over the back door getting replaced. The lantern is on a motion sensor but I cant get the sensor to detect anything so I just switched it to test mode which is always on. The whole thing is on a timer switch in the back porch.

Labels: , , , ,

Friday, November 4, 2011

Electrical


As a birthday treat I got to rewire the front massive living room. This was not very fun mainly because the previous owner had a lot of dogs and would apparently let said dogs run around and poop in the crawlspace. There was also quite a lot of rat shit as well. Crawling in this stuff is not entertaining.

Since this job was more than just a direct upgrade/adding a single new outlet I needed to do a pull all the way back to the breaker. Naturally getting the correct parts meant the customary multiple trips to home depot. Installing the breaker and the conduit was fun with the power going off and on about 30 times as I did some wiring then cut some conduit. After the first plan on where to run the conduit would have had me entering the basement directly on a floor joist we had to scrap that plan and come out the side of the breaker box instead of the bottom.

With the conduit installed and the romex in the basement then came the fun task of pulling the wire and tacking it in place. I pulled to the first outlet in the line split off a junction box and stopped for the night, completely filthy. The next night was Halloween and the neighborhood really got into the spirit of things. I quickly got some more wire pulled as Belle distributed goodies. Then as I was out of the basement getting more staples and wire nuts Belle called my phone from the front of the house to send me on an emergency candy run. I suppose my costume was homeless bum who sleeps in the dirt. $30 worth of candy procured and just in the nick of time as Belle had 3 lollipops left in the candy bucket. I was very happy to see lots of trick or treaters come by. Our neighbors mentioned that the the last owner kept the gates locked for the previous 20 or so Halloweens. Gave a random tour (number 6?) to a very nice lady from down the street and gave up getting any more done on the electrical. Spent the rest of the evening chatting with neighbors and kids. Chi got to make an appearance and spooked some kids but most were very excited to see her.

Tuesday I went back down for dungeon crawl #3, and we now have 4/6 outlets done in the living room and wire pulled for the other two. One more crawl and I can tear out all the knob and tube down there.


Other things we have done:
Moved the koi pond to the front porch
Carved pumpkins
Stained and installed crown moldings/footers in the office. Thanks cousin T!
Started wallpaper removal from the bedroom ceiling.
Built a new koi pond spigot out of larger bamboo.
Mandatory 3 trash bins filled to the brims.
MaGyver continued to work on the rose garden.

Labels: , ,

Tuesday, October 25, 2011

Painting!

So we finally painted a room, which really feels like an accomplishment since it is actually moving the house toward a finished state. Its really hard when most of the work done is a band aid to just make living here more tolerable. We have some pretty grand ideas but most of the work on the interior of the house has not moved much toward our end goals. The yard work has always felt more productive to me from an end result standpoint.

Stripping and staining the redwood, and painting the office however is an actual step toward how we want the house to look and is quite refreshing. Big thanks to MaGyver for laying down some primer and to our old neighbors J&N for painting assistance. In fact our team of 5 got quite a bit done:

I continued to work on adventures in romex wire. We want to move the Koi pond to the front porch so I installed an outdoor outlet which is substantially more difficult than running non conduit indoor wiring. In addition to installing the outdoor outlet I replaced the sketchy open air connections with actual junction boxes that were *gasp* protected from rain. Sometimes the world rewards you in very convenient ways, in this case the extra conduit I had left over was a perfect fit to cover the exposed wires on the roof that powers the knob and tube. Did not need to cut it at all, and was very pleased by that fact.

While MaGyver cleaned the office then laid down a layer of primer, Belle, J, and N planted the frankentree. This thing is cool, its actually 5 trees grafted onto a single root stalk. It has 2 kinds of peaches, apricots, nectarines and plums. Water one tree, get 5 fruits.

Afterward, J and I continued to paint the office, in the bronze yellow color and Belle and N were patching cracks in the bedroom plaster.

Meanwhile Kai and Toby, J&N's corgi played in the yard and tired each other out. Kai has learned "inside voice" barking where she will bark extremely quietly while inside with us then run outside and bark at full volume. Together her and Toby whipped all the neighborhood dogs into a chorus as they discussed the intricacies of their lives.

Labels: , , , ,

Friday, October 21, 2011

Phone back, big update

My phone got fixed and returned this week. The work order said they "Replaced Component" thanks Samsung... Pretty sure they were supposed to send me a shipping label too but never did so it cost me 60 bucks to ship it. All in all very crappy experience. Plus side is Google had all my contacts etc backed up, once I signed back in it was smooth sailing.

Well in the last couple weeks we have gotten a ton of stuff done, and had some mishaps as well. My focus has been on the office which is quickly becoming the most finished room in the house in terms of how we want things to look when finalized. Nearly all of the old white paint has been removed from the door frames and last weekend I redid the electrical and also moved the internet wire to run into the basement then inside an interior wall instead of being stapled around the door frame. Patched up all of the walls and its almost ready for paint.

I also modded some outlet frames which came out very cool bronze looking. Simply sanded the paint off with some 220 grit sand paper to make it look like reflected water. Definitely looks better than the flat black you can compare here. The white outlets still look kind of silly so I might get some black ones or paint the faces. They are not high traffic plugs so paint might not get too scratched up.

Belle has been hard at work stripping the wallpaper in the bedroom. Also last weekend the last 2 gaping holes in the bedroom got patched, which leaves us only with 3 rooms left from the repipe, the upstairs bath which is half done and waiting for a shower, under the sink in the kitchen, and the bathroom by the pond.

Speaking of the pond, one of our Koi fish got sick and died, and worse in the flurry of trying to save/quarantine it the pond pump line got bumped and the water started being pumped out of the pond. We didn't notice and promptly left for work only to come back to all of our fish in about 2" of water as the entire 30ish gallons had pumped out over the course of the day. Luckily it drained through an old shower vent hole and most of the water ended up in the dirt. I guess having a sloping floor helps in some situations. Outside of the one Koi, none of the other fish were harmed in the debacle as the giant albino catfish dredged a trench in the sand and led them all to safety.

We are once again insured! I took to the roof to nail down the flashing the insurance company complained about. Since our roof is very high up (30' maybe) and our biggest ladder is 6' the only way was to come down from the top. I tied off to the chimney and slid down to the edge. Quickly nailed the flashing and cleaned out the gutters. Was not too worried but it is a long way down, big thanks to whoever did the brickwork on the chimney 100 years ago.

The plants are doing fantastic, even the pepper plant that the tree trimmers landed a pecan branch on top of is rallying.

I added an outlet to the basement when I was doing the wiring for the office.
I replaced a broken outlet next to the microwave, and we no longer need to use an extension cord.
Brother and I knocked out/dug up the old dead palm tree stump and most of it fit into the green trash bin. Going to get the rest in this week's load.
Mom came by and cleaned up the rose garden.
After the rain (roof was fine btw insurance ppl) the yard looked really good, cool green clovers are popping up all over by the orange trees.


Labels: , , ,

Monday, October 3, 2011

Dead bushes and phones.

Well my Nexus-S smartphone bricked (when attempting to write a DIYKai last week) and took its pictures with it. We have had a lot of progress go down in the last couple weeks. Here are some highlights (no pics for obvious reasons):

Tree trimmers came through, and while they did a lot of work on the trees and yard they were a bit indiscriminate about their destruction. The other side gate was knocked off its hinges and probably needs to be replaced (hey I know exactly how to do that). The avocado tree and pepper plant mentioned in the previous post were killed mere days after by reckless trimmers. :(. We also just discovered a massive palm tree stump where hideous bush version 2 lived. Suck, that thing will be a PITA to remove.

Some walls have been patched! I suck at mixing plaster, too thick and it solidified in 5 minutes first time, too thin and took forever to fire second try. Wallpaper in the bedroom is being scraped.

I did some stripping in the office, and then stained one of the window frames to match the built in bookcase. Stripping/sanding off the 7 layer dip of (probably] lead paint is not an easy task nor a clean one. Apologies to the lining of my lungs and stomach. We are sampling some paints in the office, and thinking about colors for the bedroom too! If the office window is an indication the redwood will look fantastic once restored.

The homeowners insurance company has already threatened to drop us if we do not make repairs. Shockingly the issue they have is with the roof??? The roof that has been replaced within the last 5 years and that, I, PaGyver, our awesome home inspector and everyone who has looked at the place said is fine. Ok so Belle calls them up and it turns out the issue is just that there are leaves on the roof and one flashing is bent up, not that the entire roof needs to be replaced as their documents indicate. /whew, much easier task. 20 Gallons of water down the roof (told you it was fine) cleared the leaves, and I will figure out how to get a hammer to the flashing asap. Is it a bad idea to tie off to the chimney and rappel down to the edge of the roof? It must be at least 30-40' high so my ladders are out of the question unless I can convince PaGyver to bring down his 40' extension ladder.

Other things:
*Bathtub removed from downstairs bath to prep wetroom install. A clawfoot from 1923 is sitting in our backyard.
*Belle built some cool cactus planters for the front.
*Installed a wireless doorbell with ringers at both gates.
*Belle started cleaning the bomb shelter rations from 1973.
*Mounted a hose rack and added spray nozzles.
*Found the rest of the seller's realtor's lock.
*Took a load of yard waste to the dump
*Brewed a hazelnut porter -- first homebrew on ye' olde' stovee
*Adventures at the garbage dump.
*Filled a bagster. Actually these suck, if you are considering them think again. The cost compared to hauling stuff to the dump yourself just sucks 140 bucks vs 48. Also it is smaller than expected (same size as my truckbed...), you cant fill it higher than the bag (4', but feels more like 3) and you dont get the bag back after they dump it (bag costs 39 bucks then 100 to dump). I almost feel like emptying the contents into my truck driving to the dump then returning the bag to homedepot and saying it was too small for our job.

Labels: , ,

Monday, September 19, 2011

Building a new gate.

Our old side gate sucked. It is the primary entrance for us and it had some pretty clunky chains as a lock mechanism. It was also primarily held together by chicken wire which would often times scratch you when you tried to unlock its clunky chains. It also had a bolt that Belle could not reach [BE:  it had a bolt?!] so we quickly got rid of and relied solely on the chains to keep it shut. Needless to say it was time to go.

PaGyver built some awesome redwood fences and gates for his house in La Crescenta. He used 2" thick redwood throughout and it came out awesome. His was stained a very rich red that I really liked and wanted to mimic. I could not find the exact stain but I think my version came out pretty good although it is a touch darker. I got some Behr outdoor redwood stain but it looked really bad, almost like painting red over the wood. It did not accent the grain and in general looked crappy. I will not be purchasing any of their stain in the future, even though I am a fan of their paint quality. In the end I found that I had some "red mahogany" generic stain over from the fish pond project, so I used that instead.

We also had a deadbolt left over from changing out our locks so using 2" planks rather than "standard" gate material let me use that deadbolt and get rid of the chains! Hooray! It also let us only need a single key to enter our home... /amazing. Now for the details of the build:

Materials:
8x 2"x6"x6' Redwood planks
2x 2"x4" x6' Redwood boards
1x 2"x4"x8' Redwood board for a diagonal didn't seem like it needed it so this can be skipped/
2x 4"x4"x8' Redwood beams (not yet installed)

I had measured the gate to be just over 4' so I figured using 8x 2by6's would put me pretty close and I could adjust the gaps between the boards to get the exact length (turned out to be 49 1/4) which gave me a half inch gap between planks.

I then cut the 2x4s to size and put a screw in each of the two outer boards (kind of built a frame). When everything lined up I added a couple more screws so it would not move. I then did a quick sanity check of putting every board in its place and made sure the 1/2" gap was correct. It was so I worked my way from outside in, lining up the gap and screwing the board in. The center gap was slightly less than .5 but still fine.

Belle and I had decided earlier that we wanted a simple curved top to the gate. I had picked an arbitrary top height of 6' (conveniently the length of the boards) and figured that a bend from 5' high to 6' back to 5' would look good. We knew the length of the gate was 4' so I set to google to figure out the formula for the radius. Turns out that it was not a chord/radius problem like I initially thought but really just a similar triangle math quiz. The answer can be found here but in retrospect it is very clearly a radius of 2.5'. So I measured 2.5 feet down from the top center of the gate and sank a screw into a scrap piece of wood (the screw floated between the center 2 boards). Then I tied some twine around the screw and the other end around a pencil. Holding the twine tight I traced the arc for the top of the gate, some quick jigsawing later and it was cut.

Smoothed the cuts a bit with a file, but my jigsaw work was better than normal so no need for extensive filing. I then rounded the entire front side except for the bottom edge with a router. This was actually the first time using my Ryobi router in free hand and it worked amazingly. It is not a plunge style but that did not matter here, I have been very impressed with the Ryobi line in general even though it is supposedly lower end. Router work done I sanded the top smooth and got to staining. Getting between the boards was tough at first but I really did not want to take the thing apart and stain the boards individually. I did end up taking off the 2x4s to stain the backside, but found that using the flat pencils made it very easy to get the rag inside the gaps. So I kept one 2x4 on at all times and re-lined up the holes. Stain applied it was ready to mount it.

Hanging a door is tricky, hanging a 100lb monstrosity of a gate is even trickier. I recruited Belle for some leveling help but the thing was too heavy for her to hold so I had to line it up while she screwed the massive bolts into the existing 4x4's (I will replace these later as it was getting late). We sat the gate on a small shim of wood to make lining it up easier and got it hung after 30 minutes of wrestling it. The hinges were spring loaded so the door would close a little too far leaving a nice Klee Kai sized escape route. That was quickly fixed with a left over copper bar screwed on as a stop.

I then installed the deadbolt which had some of the best instructions. Kwikset you guys rock. The instructions come with a hole template that you fold around the door and it lines up the hole saw hole and the 1" latch hole. PaGyver left some spade bits so I actually did have all the tools I needed for the install. Everything there went pretty smooth, locked it up and called it a night. Sunday I did some light finish work to it (added hole plugs and installed the handle).

Fun project, came out pretty good but not as epic as Dads. I really like the castle look from the outside, and most importantly only 1 chain lock left. That one will require welding, fun times.

Labels: , , , ,

Wednesday, September 7, 2011

Some bad days

Yesterday sucked to the point of failure. My goal for the night was to split off the romex wire in the middle room run about a foot patch wire and install a new grounded outlet in the kitchen for the big fridge.

Well things started to go wrong. It started off right away with the hole I exposed in the kitchen being right over a stud, apparently the kitchen wall is floating 1/2" off all the studs. Cool, make a slightly larger hole just to the right.

I didnt really have wire cutters or strippers so I was using scissors and a razorblade to cut and strip. Also the existing wire was installed so shitty that there were bare wires due to friction. I didnt have time to rerun the wire so I chopped a little extra off the existing wire and stripped past the bare point. This caused the existing outlet to be very tight when I was putting it back in it's conduit box. Which meant the mounting flanges needed to get dremeled down some.

The backplate of the outlet needed one of its port holes punched out. In doing so I managed to cut my thumb with a screwdriver. When drilling the receiving hole in the wall I once again hit a stud (awesome). No problem I drilled slightly to the side of the stud and the wire was good to go.

Well the 1 hr ended up being 3 and I yelled at Belle because the perishables were sitting on the floor. Somehow despite the power being off in the house and us not having a working fridge at all I got it in my head that this was her fault. Stupid thought which I have spent the rest of the night and this morning apologizing profusely for. At some point I realized that I should have cooked dinner but it was too late to turn back so we went hungry for the night.

To cap the fail off I ended the night by using the fancy new electric flyswatter to obliterate the light fixture above the bed sending shards of glass all over the bed, the floor and Belle.

I suppose on the plus side the outlet works and the fridge is cooling. All of the contents of the mini fridge have been moved. Still just a shitty night after such a productive Monday. Sorry Belle! <3

Labels: , ,

Some good days

Past week has been pretty good:


Monday 8-29-2011
  • Schedule competing repipe bids

  • Further clean kitchen

Tuesday 8-30-2011
  • Intentional day off, we are both wrecked

Wednesday 8-31-2011
  • Plumbers 2 and 3 give bids

  • We choose plumber 3

Thursday 9-1-2011
  • Fix leak on water closet toilet

  • We no longer have to shut off the water after use

  • Do some finish restoring on the redwood

Friday 9-2-2011
  • Trim black walnut tree to prepare for beds

  • Remove some ugly bushes and shrubs
Saturday 9-3-2011
  • Build raised bed out of extra wood in side yard

  • Plumber 3 gets tour shows where the walls will be cut up
  • Start work on chicken coop

  • Red Sheriff's mom takes another truckload of treasures. Thanks!

  • Ma and Pa Epic fly out and get the tour

  • Dinner at Mike's with Chi too this time
Sunday 9-4-2011
  • Start removing wood in working bathroom

  • Remove old sink in now semi-working bathroom

  • Get up in the middle of the night because its raining on tools

  • Rain stops 5 minutes later

  • Put roof on chickencoop, sort of

  • Trip to home depot for bathroom ideas and a badger 5 disposal


Labor day 9-5-2011 was awesome. Easily the most productive day we have had on this place. The day started out slow with me botching a key handoff for my old apartment and "accidentally" breaking into some mailboxes to no avail. Left a text message to clear up the confusion, had some good breakfast at Bagels and Brew and got to work.

Finished taking the redwood siding out of working bathroom. Sink and some siding were removed Sunday. Installed the garbage disposal we had picked up Sunday, with some clutch thinking from Belle when I did not have plumbers putty. She pointed out that I did in fact have plumbers putty from the Toilet fix on Thursday. Disposal in, no leaks.

Get to work on the yard, chipper shreddering the walnut branches I cut down on Friday. Also run some more of hideous bush through the shredder.

Text message comes back, pick up the keys and start packing up old apartment. Do a precautionary load of laundry. Dad calls saying he is in the area and can help. Thank God. We move the fridge and Washer/Dryer along with tons of miscellaneous stuff. I am fully reunited with my tools.

Install washer and dryer, but in order to move them in it was just Belle and I and the washer is very heavy. She did a great job but regardless got her fingers hurt by the sheer weight of the thing and the crappy handholds. Also the Koi pond had to move which I was able to thankfully slide and slide back.

Did a load of sheets in the new setup. Hooray!

Labels: ,

Sunday, August 28, 2011

Sunday Super Update


Monday
  • Get keys
  • Move bed
  • Discover dozen people in backyard who assist with unload
  • Candlelit In-n-Out dinner (b/c we have no power)
  • Establish basecamp (fly swatting, stuff moving)
Tuesday
  • Change padlocks
  • Establish power
  • Move couch-passerby helps!
  • Move Minicooper
  • Establish fridge (aka cooler full of beer and water)
  • Deeper clean bathroom
Wednesday
  • Let former groundskeeper in to collect his tools
  • Move projector cabinet, recliner
  • Discover half dozen people in backyard to assist with unload
  • Change lock
Thursday
  • Move Koi pond, The Park evacuation complete*
  • Continue Cleaning (Spider-guarded apocalypse provisions cabinet)
  • MacGyver braves the clawfoot shower
Friday
  • *raid The Park for laundry facilities
  • Original Mike's for dinner sans Klee Kai
  • Continue Unpacking, Cleaning (previous owner wife's cremains container, nazi collectibles)
Saturday
  • Establish internet
  • Setup "war room" projector b/c We're Under Attack @ work
  • Deeper clean kitchen
  • Partially remove hideous green awnings (chicken coop roof?)
  • Remove heavy duty drapes
  • Give first tour to a passerby who wants to buy the house
  • First bid on Copper Repipe (plumber #2 is a no show)
  • Make Sun Tea
  • Paleontologist Kai unearths jawbone treasure
  • Water closet running water fix attempt 1...
  • Indiana Jones, PaGyver, 모친, and Benny arrive with furniture, real mini fridge, and Tools
  • Original Mike's for dinner (they gave Benny water!)
  • Discover Dan Halladay's Will scratched in pencil on snake oil box from 1918
Sunday
  • *Raid The Park freezer for Kai food
  • Provision fridge
  • Introduce Red Sheriff's mom to Treasure Heap
  • Setup car tire composter
  • Juice entire lemon tree
  • Backyard adventures with power tools
  • Continue Cleaning


  • The Moving Diet has not kicked in...  I am up 2 lbs...  Probably attributable to carb-heavy grazing.
  • Balancing urge to kanban the move (1 truckload of stuff comes in; 1 truckload of trash goes out), but folks are worried we will accidentally throw out a Treasure.
  • PaGyver estimates this will be a 5-10 year project; not 3, sorry MacGyver!  

Labels:

Thursday, August 25, 2011

Bought the Farm! [Caption Contest]

MacGyver and Indiana Jones' "before" pictures.  For a chuckle, compare to the before-"before" MLS listing.


Labels:

It has started.


We have gotten the house and moved in. The first night was very rough with no electricity and a very stinky bedroom. Flies literally everywhere and a layer of dust 10 years thick coated every surface.

Most of the effort so far has been moving stuff in, all we have left is the lovely Koi pond documented earlier. Outside of that, the only thing we have done is changed the locks and cleaned.

Changing the lock on the backdoor was somewhat tricky as I needed to use a hole saw to cut a 2 1/8" hole in the door to install the new lock. The previous lock had 3 holes a 1/2" center hole and 2 1/4" or so through holes for the bolts. The bolt holes lined up with my new lock but the new lock had 2 1/8" ribs that smashed into the door. Using a hole saw with a starter bit smaller than an existing through hole is very hard to impossible. Solution was to find some spare 1/2" wood in the garage and drill through that then use it as a jig. I then only cut about halfway through the door, just enough to fit the ribs. Problem solved.

Day 1 Flies Killed: 20
Day 2 Flies Killed: 47
Day 3 Flies Killed: 25

Nazi artifacts found: 3

Overall status: Swamped!

Labels:

Sunday, July 3, 2011

The coming storm.

In 45 days we will be homeowners of a house that has lived for nearly 5 times our age. The house is need of substantial work, the owner kept everything vintage as he and his wife were antique collectors. I will be undertaking the arduous task of updating the home to the 21st century while keeping the vintage quality that truly makes the house unique.

A friend of mine recently went through a similar process with a house half the age and while his house came out excellent, it feels like the changes made were designed to make it look and feel like it was built in 2011. This is definitely not the end result I am desiring. Ryan and I would often joke about me building and installing a custom banister to his second floor. As he is a massive Street Fighter fan, it would have carved figures of Ken doing a flying upper cut in freeze frame up the stairs. Basically the image on the right carved into wood 7 or 8 times. Anyone who would walk into the house would immediately know that it was Ryan's. While alas the Street Fighter banister was only a dream, the feeling of obviously knowing that the home is mine (and Belle's) is what I want to convey throughout.

While Ryan did much of the work himself, most of the construction and rehab was done by contractors. Outside of the immediate needs (plumbing rehab on day one), I will be trying to do as much of the work as I can on my own. I am fortunate in that my father has already passed plenty of home rehab knowledge down, but I think that this start to finish project will continue to allow him to teach me lessons not just in construction but in art as well.

It is going to take a lot of work to get it there, with the first steps being establishing habitability in a select few rooms opening up a greater amount of time for me to get down to business and churn out some epicness. Once the basecamp is established we have a plan to go room to room and gut it, restore it and customize it. I think this blog is going to serve as both a document of how far this project has moved and as a way to stay focused and get my ideas down when my body is too tired to keep hammering.

Going to get some overall before pictures up so that we can see exactly how large an effort this is.

Labels: